


")


Do you struggle making flatlays? Are you unsure how to style your images in a beautiful, eye-catching, and consistent way?
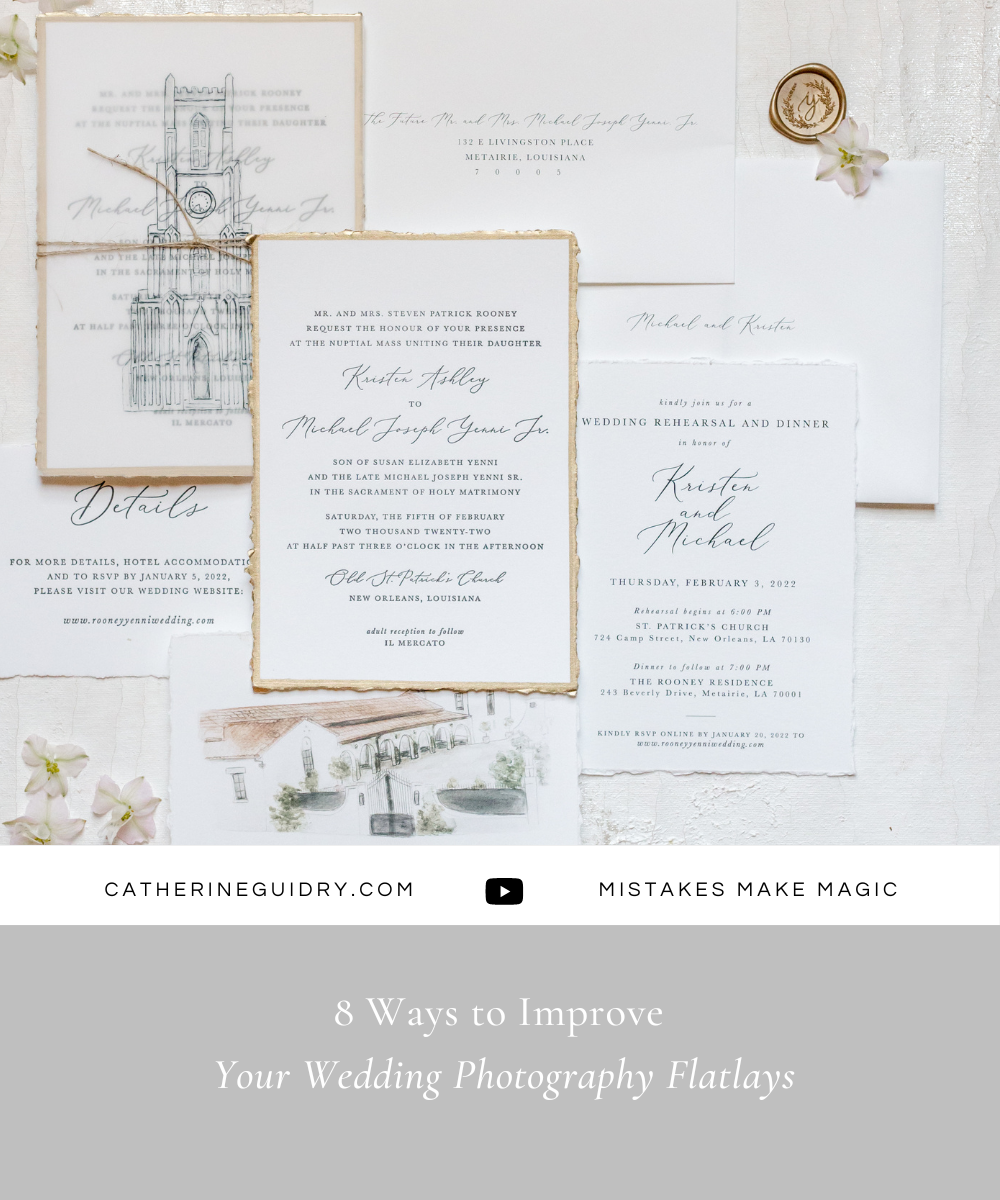
After many years of trial and error, I’ve figured out some flatlay hacks that have made everything easier! Today, I’ll give you my best tips on how to improve your flatlays to create strong images your clients will cherish.
1. Get a Styling Mat
Oftentimes, whatever venue you are photographing at, you’re probably going to see carpets or flooring that are very patterned or done in colors that don’t match the style of the wedding. That’s where the styling mat comes in!
The styling mat I use is from a company called Chasing Stone. It’s a neutral white hand painted backdrop, and I keep it in a bag to protect it. I love that it’s small, it has a bit of texture, and it provides a neutral backdrop for my photos.
If you have a wedding that’s dark and moody, you can consider photographing the details on a wooden floor or something with more texture. But for me, most of my clients have bright, neutral, and classic color palettes, so this styling mat works beautifully. 🤍
2. Use Styling Blocks
I use clear styling blocks in a variety of sizes and thicknesses from a company called Sourced Co.
These are so handy to prop up bouquets and any other details you’re photographing, but they’re REALLY great for giving the paper goods some dimension on the styling mat. They create shadow lines and don’t leave the stationary feeling quite as flat in the image. I highly recommend using styling blocks!
If you’re not in a position to purchase styling blocks yet, I’ve used a variety of things on a wedding day in place of them: matchboxes, lens caps… you name it, I’ve done it! 📸
3. Turn Off Artificial Light
Before you start to photograph the details, ask permission from the hair and makeup team once they’re finished if you can turn off the artificial light wherever you’re photographing.
The reason why is because if you’re getting natural light, which tends to be more blue, and you’re ALSO getting artificial light, which tends to be more orange, you’re going to get an orange or yellow cast on your details. You want all the lighting to be very consistent.
4. Set Up Near a Window
Which leads perfectly into my next tip: set up next to a window. When I arrive at a wedding, I’m going to scan the room and find the most beautiful, soft window light out of the way of everyone else.
You don’t want to set up right next to the makeup artist, for instance – people will be walking around, and you don’t want them walking on the details!
Then, I turn off all the artificial light and set up the styling mat. I set up the top of the styling mat closest to the window, and then my feet are pointing toward the window, on the other side of the mat. That way, when you’re photographing down, you don’t have any shadows being cast on the stationary or paper goods.
It’s not unusual to arrive at a wedding where the wedding planner has already styled the details. Don’t be shy to let them know you prefer a different lighting arrangement. Have them assist you to turn the top of the flatlay closest to the window, and you’ll be good to go! ☀️
5. Group Items That Go Together
You’ll want to group the items of your flatlay according to what looks best together and as they usually appear during the day. Even if there are items you don’t want to include in your portfolio, I always take Jose Villa’s approach: “One for thee, one for me.”
Meaning, be sure to photograph whatever details the client wants. But when you go to style them for your own portfolio or for a publication, photograph the details that look best together.
For instance, when I’m photographing details at the reception, maybe the planner wants me to beautifully style the reception details. So we’d group:
- Custom drinks
- Custom napkins
- Party favors
- Anything else significant from the reception
We’ll separate those items from the welcome bags, which will be an image by themselves.
We’ll also group the bride’s getting ready items all together: the wedding shoes and wedding jewelry will all be together, and the dress and veil will be together.
Even with the invitations, I might photograph a few versions:
- The invitations with the program and the menu cards
- The invitation and the program
- The invitation only
That way, the bride or the publication will have options and can and choose whichever they prefer.
6. Pay Attention to Spacing
Try not to leave big gaps or inconsistent gaps in between the paper goods. This is one of the biggest mistakes I see in up-and-coming photographer’s portfolios.
When you’re styling, try to move objects toward the center and toward each other. Everything in the image should have a relationship.
I also learned years ago that most publications and social media platforms are looking for vertical images. When I’m photographing details, I try to make them grow vertically rather than horizontally.
7. Use Styling Blooms
Communicate in advance to your client that you’re planning to photograph their details on the day of the wedding, and something that can help make those images extra beautiful are loose styling blooms 🌷
For a nominal fee, florists can include a few extra styling blooms that you can incorporate in the detail photos. When I’m laying them out, I’ll cluster them together in sets of 3, or I’ll break apart greenery into the flatlay to give it more dimension in character. These are a great addition to the flatlays!
8. Include an Overall Photo AND Close Ups
You have a beautiful overall styled image, but you also want close ups of each individual detail piece. Be sure to get close ups where they can read the invitation, see the details of the rings and the shoes, and so on in the gallery.
To achieve this, try an aperture of around F4 so that the stationary is legible. Your clients will want to actually see the texture of the letters and the fonts that were used to truly remember all the details of their special day 🤍
Your Next Steps
Now that you know how to arrange your flatlays, you need a list of the best go-to poses!
Do you ever feel stuck or nervous trying to come up with poses on the spot? Or maybe you use the same poses over and over and need something new?
I’ve been there… and now I’m sharing what I’ve learned to help you! My Posing Guide below will allow you to:
- Build confidence so your clients know EXACTLY what to do
- Have “go-to” poses to create consistent, strong images
- Never feel stuck or on-the-spot – you’ll have a posing flow!
Check out the Posing Guide below. ⤵️